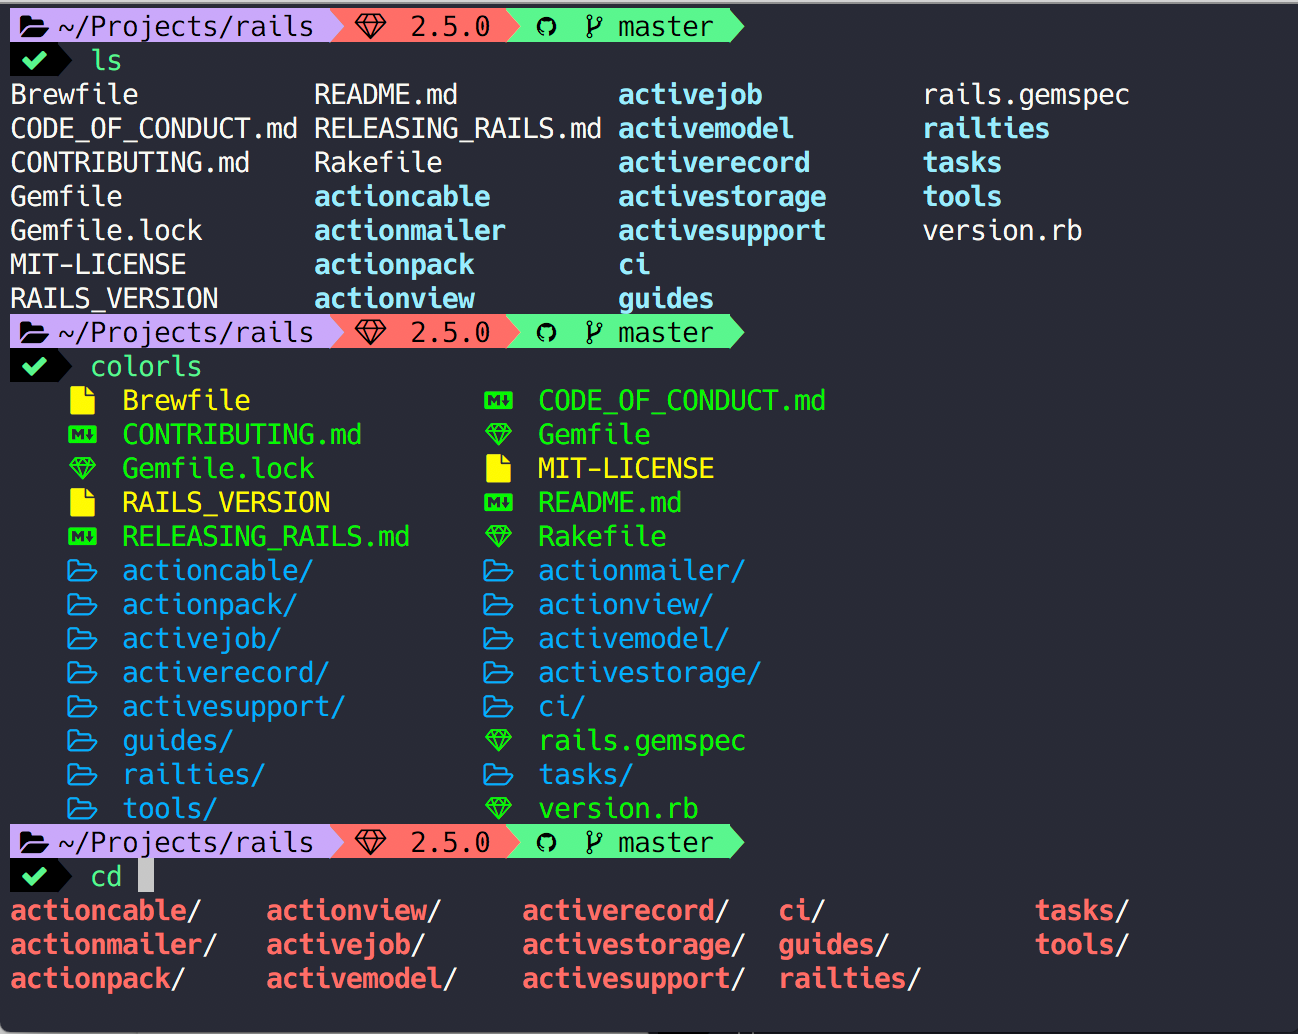
Make your terminal more colourful and productive with iTerm2 and Zsh!
Tired of a terminal with plain 12pt plain black text on plain white background? You can transform it from a monochrome experience to a more colourful one with added productivity features by installing:
Install iTerm2 here or through homebrew with the below command. iTerm is is a customisable terminal for mac. This is the terminal that we will add loads of extra options to.
The Z-shell resource file, ~/.zshrc, is a script that is run whenever you start Zsh. This tutorial will add things to this file to configure your terminal.
To change the default shell to Zsh rather than bash, run the change shell command in your terminal.
chsh -s /bin/zsh
Zsh-users have created some useful additions that integrate with it. One of the cool things you can add is syntax highlighting to colour command types. Another one is auto suggestions, which remember common commands that you can easily re-run.
Nerd fonts
To be able to have prompt with extra icons, such as for github, you need to install a special font set. This will show you how to install and configure nerd-fonts.
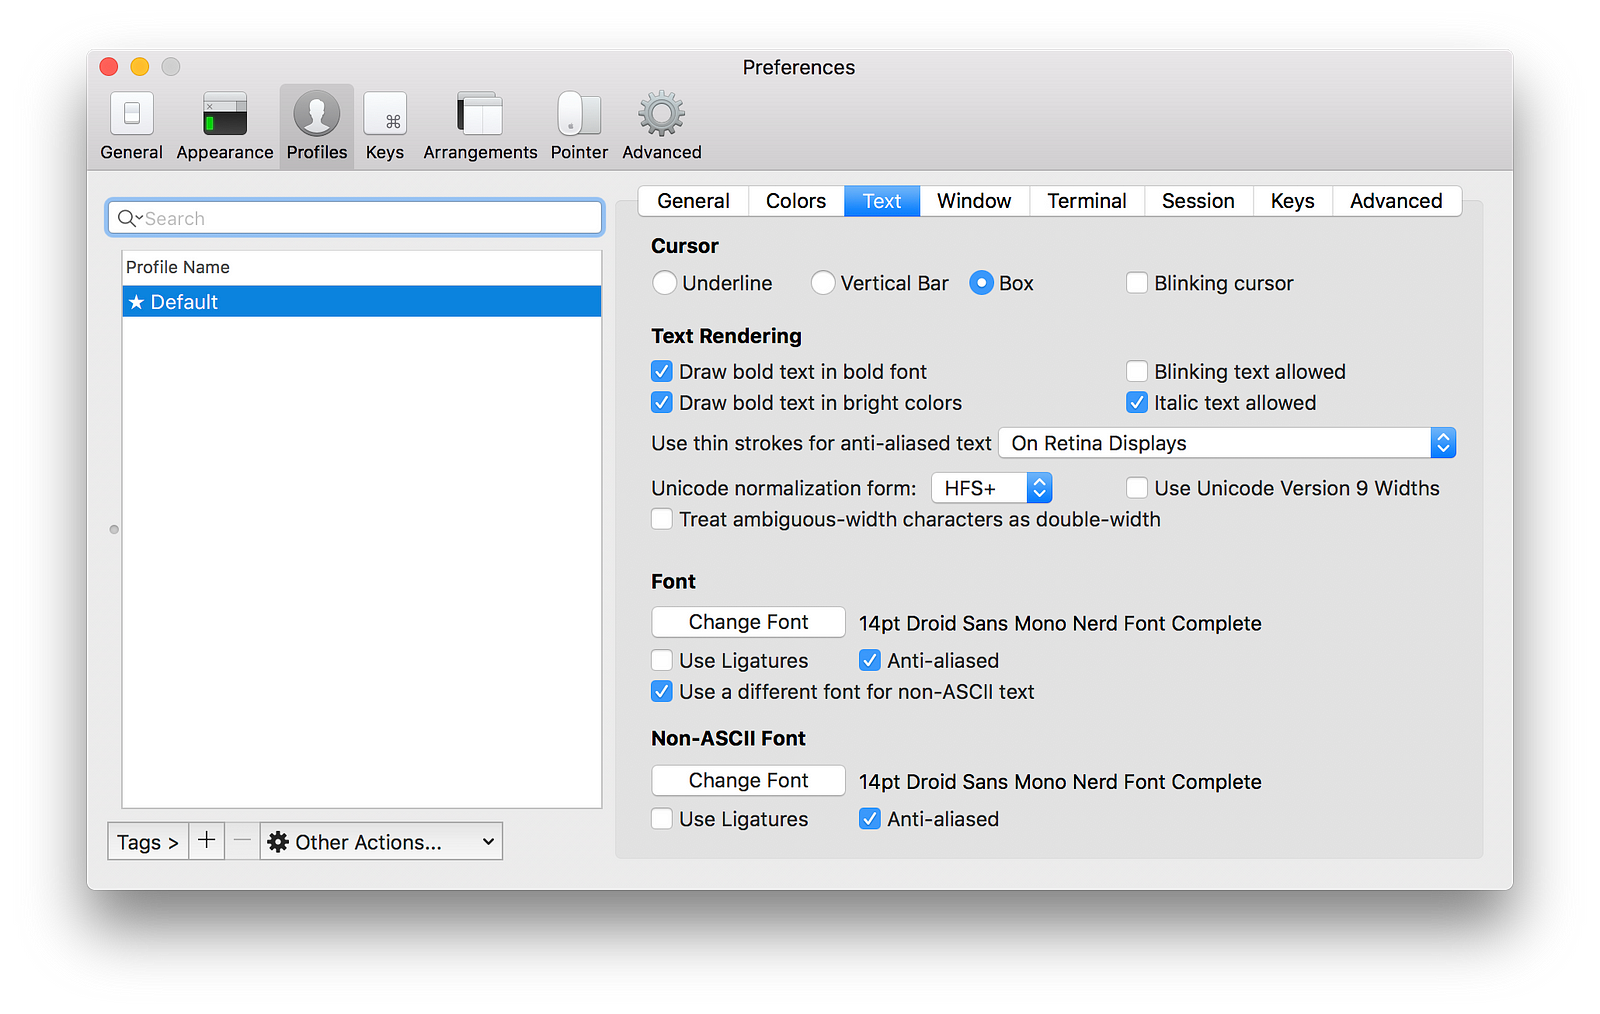
iTerm2 -> Preferences -> Profiles -> Text -> Font -> Change Font
Select the font Droid Sans Mono Nerd Font Complete and adjust the size if you want too. Also check the box for Use a different font for non-ASCII text and select the font again. It should be displaying the new font and icons in the prompt.
Powerlevel9k
There are many themes for for zsh, but my favourite is powerlevel9k.
You need to tell powerlevel9k to use the Nerd Font in your ~/.zshrc.
Powerlevel9k is highly configurable. To change your setup, open your ~/.zshrc and add in the configuration your prefer. In the screenshots in this post I have used the following setup, which are listed in my ~/.zshrc.
If you are proud of you configuration, some people share theirs online, such as at Show-Off-Your-Config.
Colour schemes
There are many iTerm colour schemes out there. One source is iterm2colorschemes, which gives you about 175 choices. Once you have downloaded them, select iTerm -> Preferences -> Profiles -> Colors -> Color Presets -> Import then select the colour scheme you like. The one colour scheme I have used in this article’s pictures is Dracula.
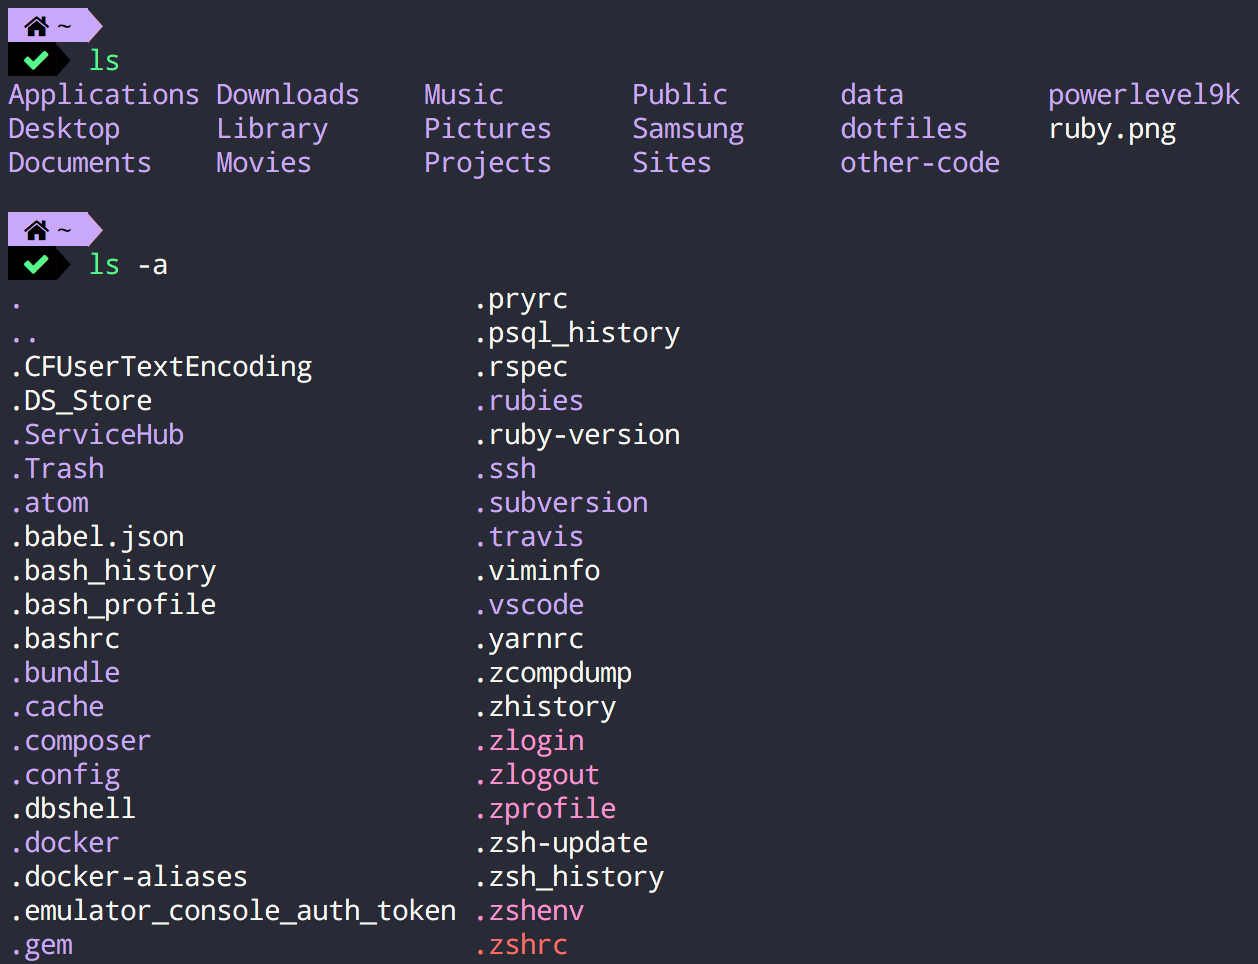
You can make your ls command display coloured file names using your chosen colour scheme using the -G option. Add this as an alias to your ~/.zshrc file using:
echo "alias ls='ls -G'" >> ~/.zshrc
You can make your file lists match the colour scheme you have chosen if you set ‘ls -G’ as an alias for ‘ls’.
Ruby gems
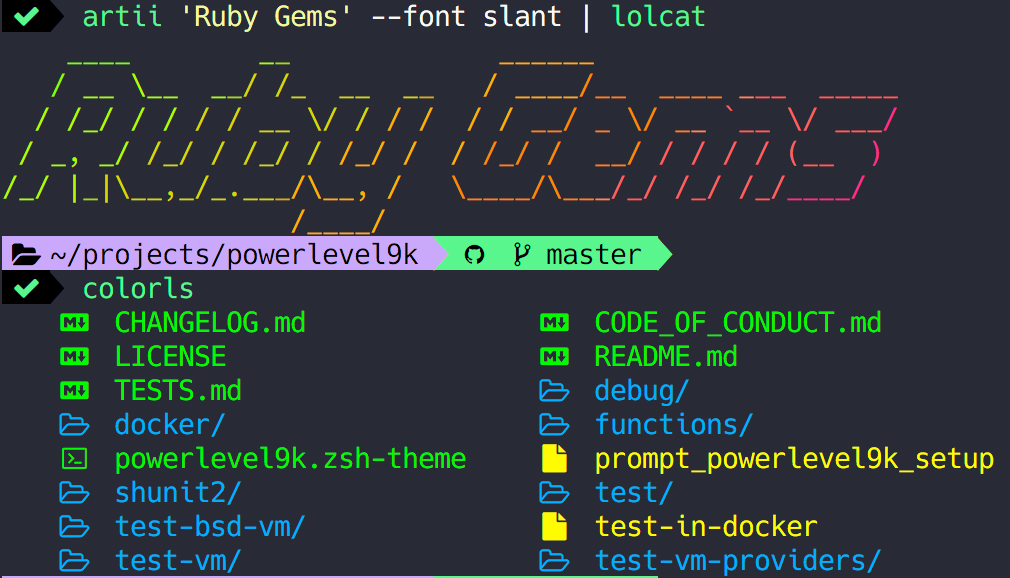
If you code in Ruby — or want to start — there are some colourful Ruby gemsthat can take this further. The colorls gem is used in the image at the top of this post to colour the file types and add icons next to them.
This Apple Mac problem is a regular enough occurrence that I'm making notes to remind what I need to fo to fix it to save me hunting around the web each time it happens.
It is particularly annoying to find all of your shortcuts, favourites and folder arrangements suddenly wiped out from your Apple Mac Finder Sidebar.
Some people find that turning it off and turning it back on again can reinstate the favourites, or, there is a plus/minus icon beside the favourites title that shows and hides the favourites. Sometimes, this can sort the problem out and sometimes it doesn't lose or forget all of the favourites you've setup.
How to fix missing sidebar in Apple Finer app
The fix, is simply to delete the com.apple.sidebarlists.plist file and then reboot your machine.
In my experience, this option forgets all of your favourites and you have to set them up from scratch, again.
By default it does not create a separate log file for MySQL errors, but you can add a line to separate the error messages out.
log_error = /var/log/mysqld.log
MySQL Tuner
For suggestions on improving your MySQL configuration, install MySQL tuner. Run it after MySQL has been running for at least 24 hours. The more time the better the suggestions.
Then to run the program, you must be logged in as a user that has privileges to access MySQL. For me, it would not work as my usual user account and I solved the problem by logging in as root and changing to the directory that I wget'ed mysqltuner to.
./mysqltuner.pl
A sample output might be:
-------- Recommendations ---------------------------------------------------------------------------
General recommendations:
Control warning line(s) into /var/log/mysqld.log file
Control error line(s) into /var/log/mysqld.log file
Dedicate this server to your database for highest performance.
Configure your accounts with ip or subnets only, then update your configuration with skip-name-resolve=1
When making adjustments, make tmp_table_size/max_heap_table_size equal
Reduce your SELECT DISTINCT queries which have no LIMIT clause
Set thread_cache_size to 4 as a starting value
Performance shouldn't be activated for MySQL and MariaDB 5.5 and lower version
Consider installing Sys schema from https://github.com/mysql/mysql-sys
Variables to adjust:
query_cache_size (=0)
query_cache_type (=0)
query_cache_limit (> 1M, or use smaller result sets)
tmp_table_size (> 16M)
max_heap_table_size (> 16M)
thread_cache_size (start at 4)
performance_schema = OFF disable PFS
innodb_log_file_size * innodb_log_files_in_group should be equal to 1/4 of buffer pool size (=64M) if possible.
MySQL Log Files
The two main log files for MySQL will now both be in the following directory.
It summarises the number of times the same query has been logged to the Slow Query log. By default, mysqldumpslow sorts by average query time but you can use the -s option to sort by t or at, query time, l or al, lock time, r or ar, rows sent or c, count.
Another useful options is -t N to display only the first N queries in the output.
Download Raspbian - Download the full version with the GUI, not the lite version
Use a program like Etcher to put the Raspbian img image file onto an SD card. If you're on Windows use Win32DiskImager.
Boot the Pi
It should boot into the graphical user interface
Set the locale and timezone under preferences
Enable SSH server under preferences
Connect to WiFi by waiting for the task bar network symbol to detect local SiFi SSIDs
If the device is not booting into the GUI, run raspi-config to configure the device
Start a terminal window.
I often have to set the display properties to avoid blank displays on reboot. I think is because I am using older monitors.
sudo nano /boot/config.txt
Then uncomment the following lines:
hdmi_force_hotplug=1 config_hdmi_boost=4
It might be worth a reboot at this point to make sure the display works. As a precaution you can check your IP address so that you can SSH into the Pi if the screen doesn't come back
sudo ip addr sudo reboot
Install the unclutter app which hides the mouse pointer after inactivity
sudo apt-get install unclutter
Then make boot configuration changes
sudo nano /boot/config.txt
Add the following lines
# Display orientation. Landscape = 0, Portrait = 1 display_rotate=1 # Use 24 bit colors framebuffer_depth=24
Finally, to make the Pi auto run DAKBoard in a chromium browser kiosk view. Edit the autostart file:
sudo nano ~/.config/lxsession/LXDE-pi/autostart
Add the following lines to it
@xset s off @xset -dpms @xset s noblank @chromium-browser --noerrdialogs --incognito --kiosk http://dakboard.com/app/?p=YOUR_PRIVATE_URL
Now you can reboot the Pi and it should boot up to run DAKboard
sudo reboot
Remote Desktop Setup
In order to set up Remote Desktop, the easiest way for me is to use Microsoft's Remote Desktop Viewer, as i use it for other tasks, which uses RDP, Remote Desktop Protocol.
I had to remove xrdp, vnc4server, tightvncserver, which were all installed in the wrong order.
I had to install tightvncserver, then install xrdp.
The pi will not remember the time between reboots. It does not have a real time clock. We need to modify the ntp settings
To back up the configuration file before making any changes to it type the following:
‘sudo cp /etc/ntp.conf /etc/ntp_backup.conf’
I live in the UK so these will be set to ones within the UK.
Type ‘sudo nano /etc/ntp.conf’
you will see on the page something like this:
server 0.pool.ntp.org iburst
server 1.pool.ntp.org iburst
server 2.pool.ntp.org iburst
server 3.pool.ntp.org iburst
Change this to your local time servers. Navigate to http://www.pool.ntp.org/en/use.html to find yours.
Example if your in the UK you should change the entry in your ntp.conf file so it looks like this.
server 0.uk.pool.ntp.org iburst
server 1.uk.pool.ntp.org iburst
server 2.uk.pool.ntp.org iburst
server 3.uk.pool.ntp.org iburst
Finally further down the file you will see the following:
restrict 127.0.0.1
restrict ::1
comment these out by inserting a ‘#’ (without quotes) at the beginning of these lines
press crtl + x then ‘Y’ will save your changes.
To update the time. you can reboot or:
type ‘sudo service ntp restart’
followed by ‘date’
Setting the monitor to turn off overnight
You can set up a cron job to turn the monitor off overnight. Copy the code in the following script
#!/bin/sh

# Enable and disable HDMI output on the Raspberry Pi

is_off ()
{
 tvservice -s | grep "TV is off" >/dev/null
}

case $1 in
 off)
  tvservice -o
 ;;
 on)
  if is_off
  then
   tvservice -p
   curr_vt=`fgconsole`
   if [ "$curr_vt" = "1" ]
   then
    chvt 2
    chvt 1
   else
    chvt 1
    chvt "$curr_vt"
   fi
  fi
 ;;
 status)
  if is_off
  then
   echo off
  else
   echo on
  fi
 ;;
 *)
  echo "Usage: $0 on|off|status" >&2
  exit 2
 ;;
esac

exit 0
Then create a new file and paste the code into it.
sudo nano /home/pi/rpi-hdmi.sh
Then update the permissions on the file to make it executable
sudo chmod +x /home/pi/rpi-hdmi.sh
And finally edit the cron table to schedule the script
sudo crontab -e
Add the following lines at the bottom
# Turn HDMI Off (22:00/10:00pm)
45 00 * * * /home/pi/rpi-hdmi.sh off

# Turn HDMI On (7:00/7:00am)
45 6 * * * /home/pi/rpi-hdmi.sh on
Creating an SD Card Image
It's wise to create a backup image of the SD card when you have it all setup. The Pi is a fickle beast and at some point, after power cuts or problems, it'll be corrupted. Being able to reflash an image will save time in getting it back up and running
again.
On a Mac
dd if=/dev/rdiskx of=/path/to/image bs=1m
Where
/dev/rdiskx
is your SD card.
(using rdisk is preferable as its the raw device - quicker)
To find out which disk your device is type
diskutil list
at a command prompt - also, you may need to be root; to do this type
sudo -s
and enter your password when prompted.
On Linux, you can use the standard dd tool:
dd if=/dev/sdx of=/path/to/image bs=1M
Where
/dev/sdx
is your SD card.
SSH Remote Identification Change
If when SSHing into the Pi you get an identification changed warning after you have reflashed the image
@@@@@@@@@@@@@@@@@@@@@@@@@@@@@@@@@@@@@@@@@@@@@@@@@@@@@@@@@@@
@    WARNING: REMOTE HOST IDENTIFICATION HAS CHANGED!     @
@@@@@@@@@@@@@@@@@@@@@@@@@@@@@@@@@@@@@@@@@@@@@@@@@@@@@@@@@@@
After a series of power cuts my Ubuntu server was unable to complete the boot process and displayed the following messages:
Begin: Will now check root file system ... fsck from util-linux 2.27.1
[ 5.4120241] usb 4-1: device not accepting address 4, error -71
[/sbin/fsck.ext4 (1) -- /dev/mapper/ubuntu--vg-root] fsck.ext4 -a -C0 /dev/mapper/ubuntu--vg-root
/dev/mapper/ubuntu--vg-root contains a file system with errors, check forced.
[ 5.524020] usb 4-1: new full-speed usb device number 5 using uhci_hcd
Inodes that were part of a corrupted orphan linked list found.
/dev/mapper/ubuntu--vg-root: UNEXPECTED INCONSISTENCY; RUN fsck MANUALLY.
(i.e. without -a or -p options)
fsck exited with status code 4
done.
Failure. File system check of the root filesystem failed
the root filesystem on /dev/mapper/ubuntu--vg-root requires a manual fsck
[ 5.940027] usb 4-1: device not accepting addres 5, error -71
[ 5.940061] usb usb4-port1: unable to enumberate USB device
LVM Root Installation
I was confused as to how to run fsck on the boot drive. This was because the Ubuntu installation I had done was using LVM2 logical volume management. This meant that the boot drive is not listed as /dev/sdx, instead it is /dev/mapper/ubuntu--vg-root.
Rescue USB boot drive
I created a SystemRescueCD USB boot drive and was then able to repair the drive using:
fsck /dev/mapper/ubuntu--vg-root
The article below helped me to finally pin this down: